Hexo-域名设置+Github域名加速+网址收录
Github、Gitee绑定域名,然后进行网址收录。
不想购买域名也完全可以进行网址收录。
购买阿里云域名
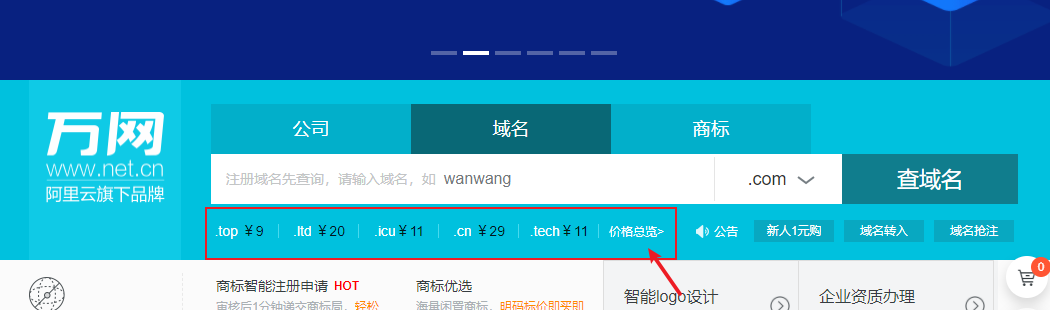
1.进入阿里云域名网站
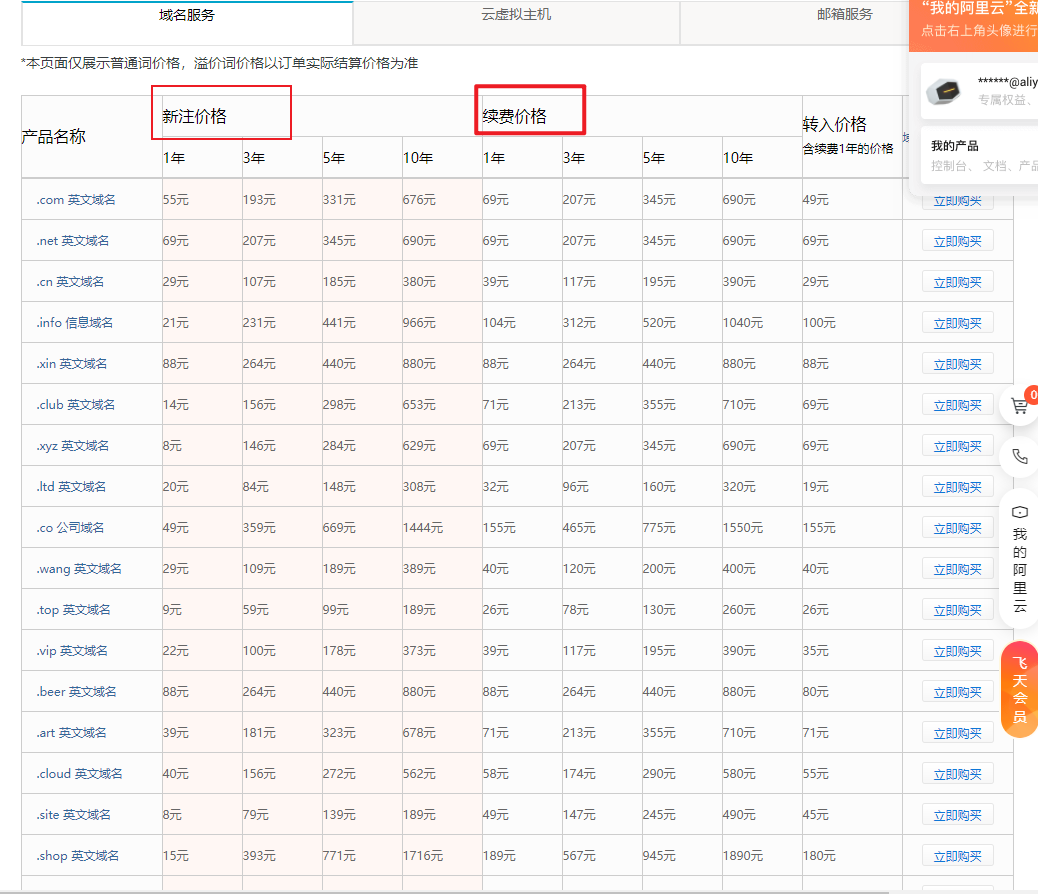
2.进入价格详情页
一定要看准,有的网站第一次购买很便宜,但是续费的价格很贵。
选准 后缀名,点击 立即购买
3.直接在上面搜索,可能会出现没注册或者已注册
已注册
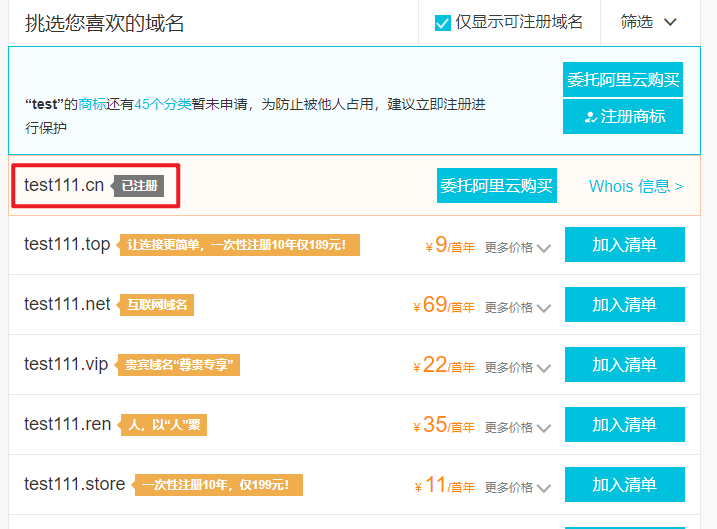
未注册

都选择好之后,可以结算了。
4.在结算页面,创建新信息模板
如果是第一次购买,网站会引导你创建新信息模板
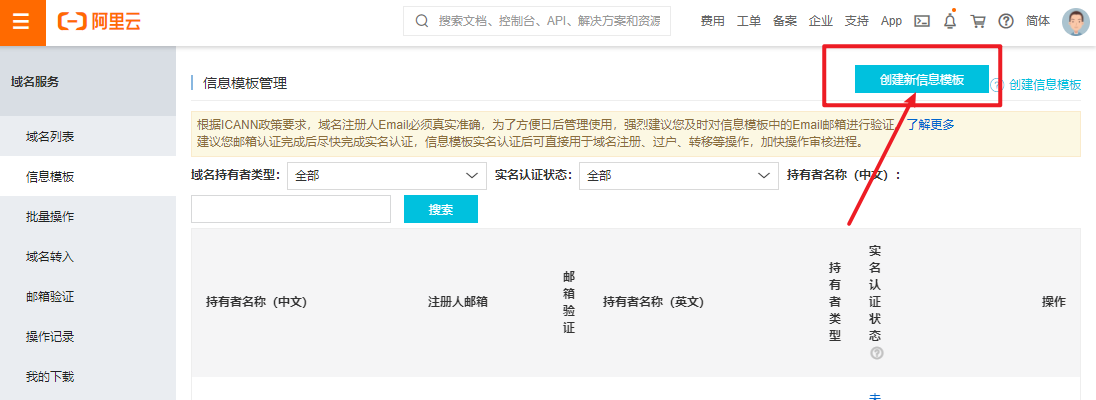
创建模板之后,保存好,可以进行实名认证,不用等通过。
5.结算页面,验证邮箱

5.结算
然后就直接支付,付款成功就可以了
一定记得购买成功5天内提交资料并通过审核后才能正常使用,否则域名将被注册局锁定。
域名持有者为个人,需要提交身份证号码及身份证正面扫描件/电子照片;
域名持有者为企业,需提交企业证件(营业执照或组织机构代码证)号码及证件电子图片;
github+hexo设置域名
1、进入自己的域名控制台
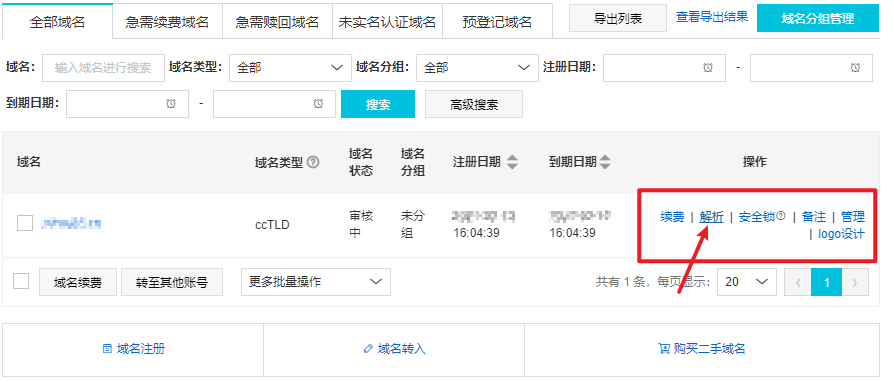
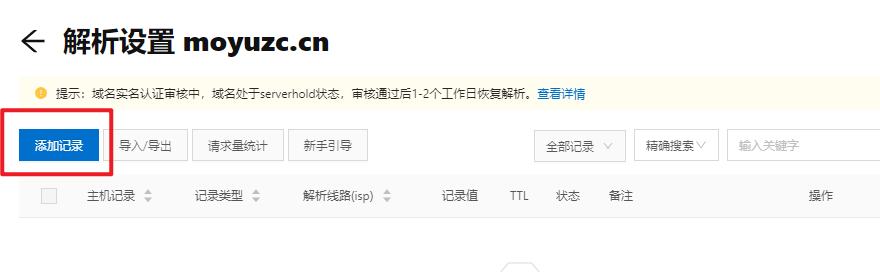
2、需要添加记录
1.
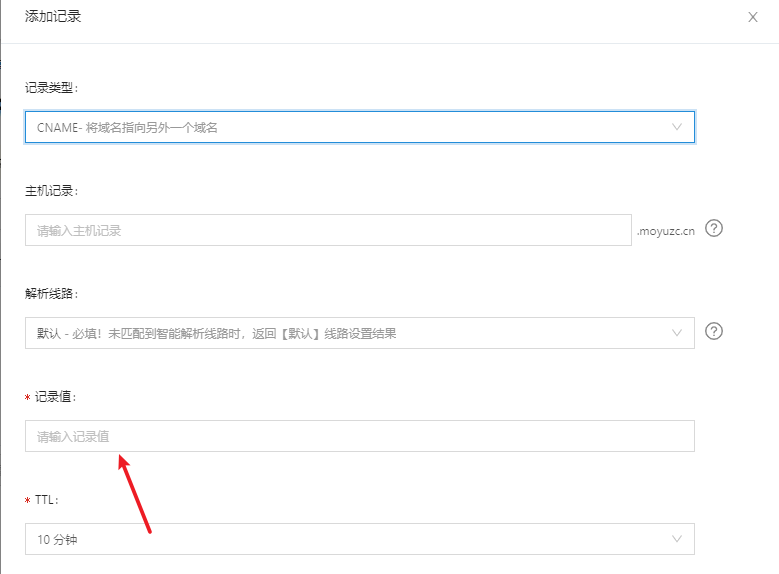
箭头处 填写能够访问博客的地址,例如:moyu-zc.github.io
- “记录类型”设置成
CNAME - “主机记录”可以设置成
@即直接使用主域名作映射,或者www即使用www.主域名的形式进行映射 - “记录值”则设置成Github Page的网址即可
- 等待几分钟后生效
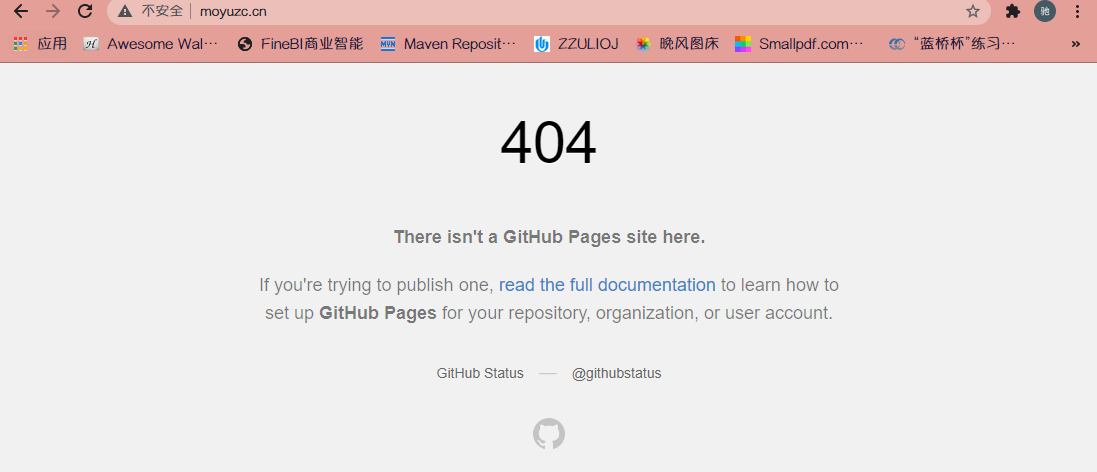
至此就建立了个人域名至Github Page的映射,但此时还不能使建立映射的域名直接访问Github Page,因为还需要在Github上发布自己的Github Page,直接访问的话会出现Github Pages 404
3、设置github仓库
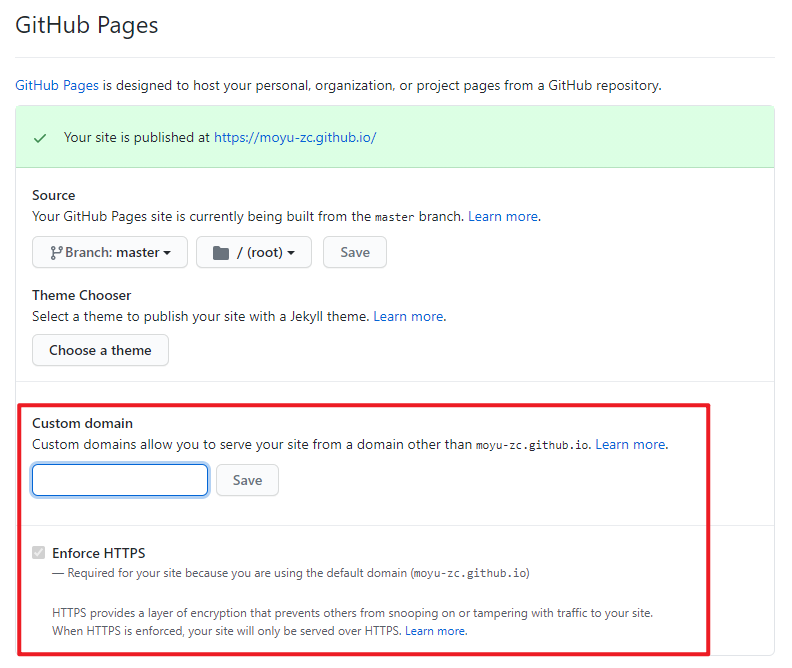
进入自己的Github仓库,点击 Settings
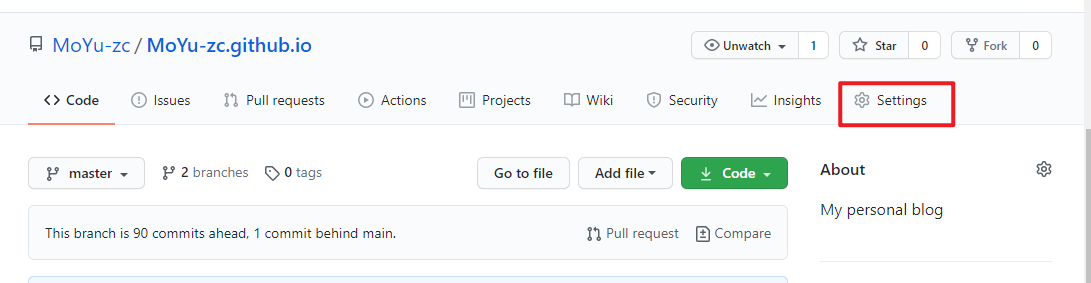
填写你以解析好的域名,先save,之后注意勾选 强制https
4、本地文件
这时你项目根目录下应该会出现一个·CNAME的文件,如果没有的话,就到根目录下的source文件夹下,新建一个CNAME,无后缀(就是把后缀删去),然后在里面填写你购买的域名。

最后在运行hexo c、hexo g、hexo d,输入你的域名就可以打开你的网站了
5、修改你本地项目配置文件的url
进入到你本地项目的根目录下,修改_config.yaml文件
修改为你自己的链接即可
# URL
## If your site is put in a subdirectory, set url as 'http://example.com/child' and root as '/child/'
url: http://example.com       #修改为你的域名
root: /
permalink: :year/:month/:day/:title/
permalink_defaults:
pretty_urls:
  trailing_index: true
  trailing_html: true
Github的域名加速
首先奉上官方指路文档,按照绑定顶尖域名的方式来解析你的域名Configuring an apex domain。
不要企图通过ping的方式,来找出所有的IP地址。因为你的网站的IP是会变化的。所以你需要添加这四个解析到IP地址的A记录。
185.199.108.153
185.199.109.153
185.199.110.153
185.199.111.153
添加完成后,你的DNS解析记录应该是这样的。

gitee+hexo设置域名
这个注意:如果想 Gitee 使用私有域名,需要收费 使用Gitee Pro
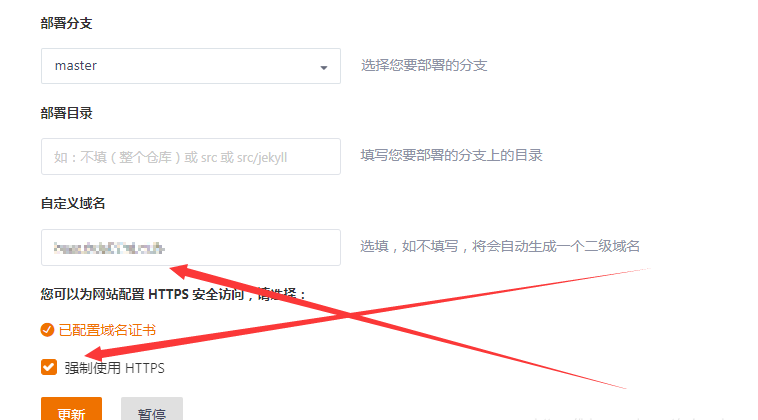
1、进入域名控制台
2、只需添加一条记录
注意,与github的不同,gitee只需要填写一条记录,内容 固定 为:gitee.gitee.io
3、进入gitee仓库

填写你解析好的域名,且选择强制使用https
4、配置域名证书

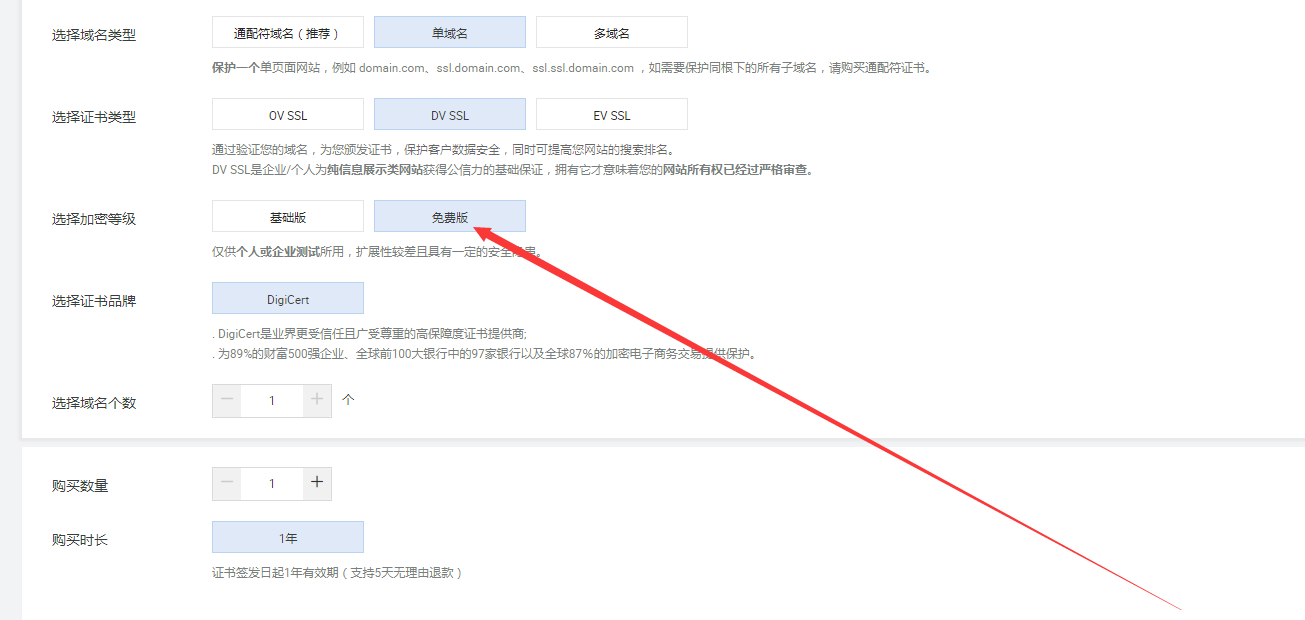

最后下载证书即可
5、回到gitee仓库Gitee Pages
添加你下载证书的内容
6、修改你本地项目配置文件的url
进入到你本地项目的根目录下,修改_config.yaml文件
修改为你自己的链接即可
# URL
## If your site is put in a subdirectory, set url as 'http://example.com/child' and root as '/child/'
url: http://example.com       #修改为你的域名
root: /
permalink: :year/:month/:day/:title/
permalink_defaults:
pretty_urls:
  trailing_index: true
  trailing_html: true
百度收录
1.提交网址
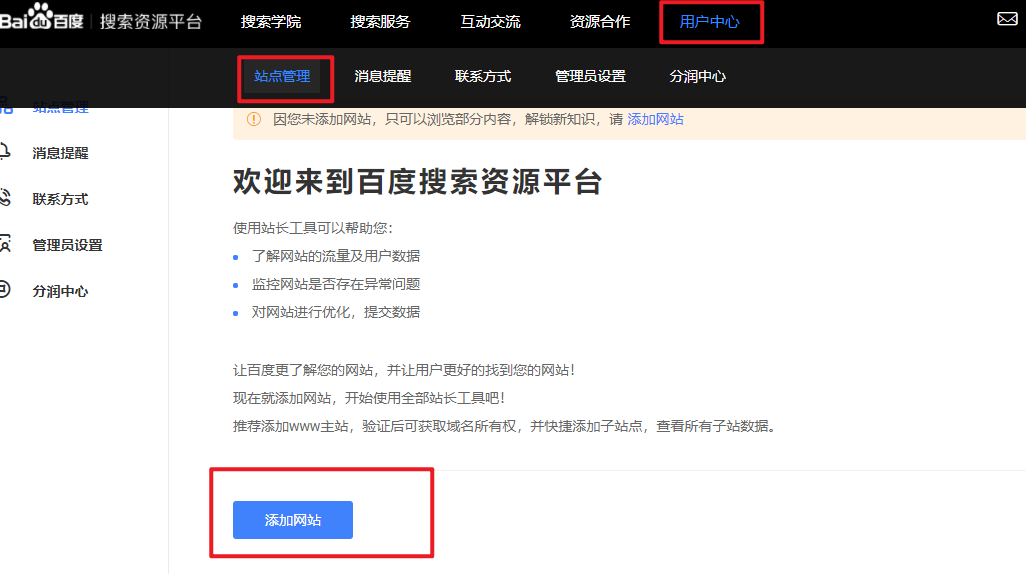
2.百度站长平台
登陆后选择用户中心-站点管理-添加网站
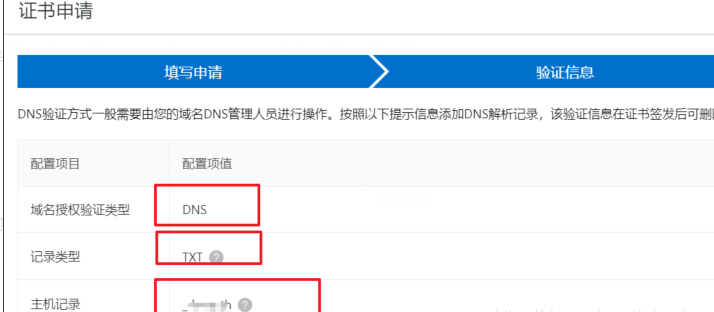
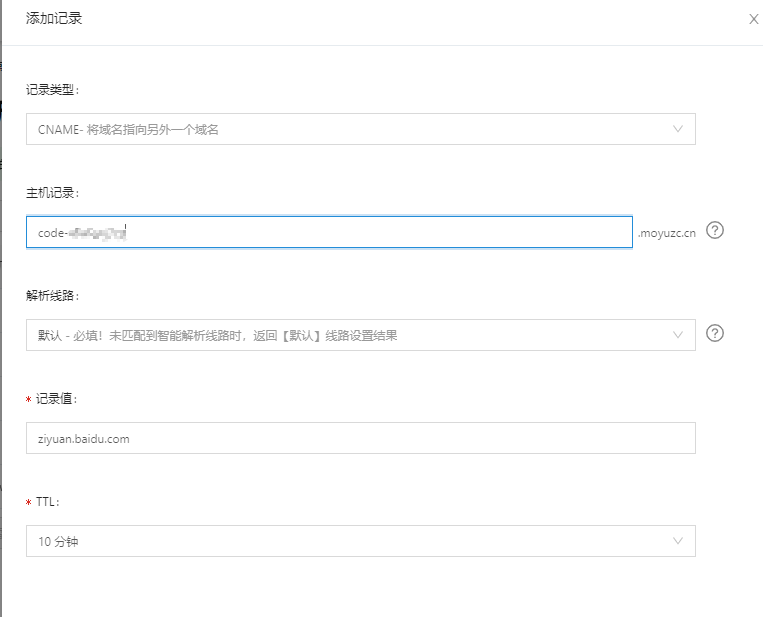
如果有阿里云网站,可以使用CNAME验证,直接通过验证
最后一步验证网址时选择CNAME验证最简单根据提示,在阿里云域名解析添加一条记录就行。

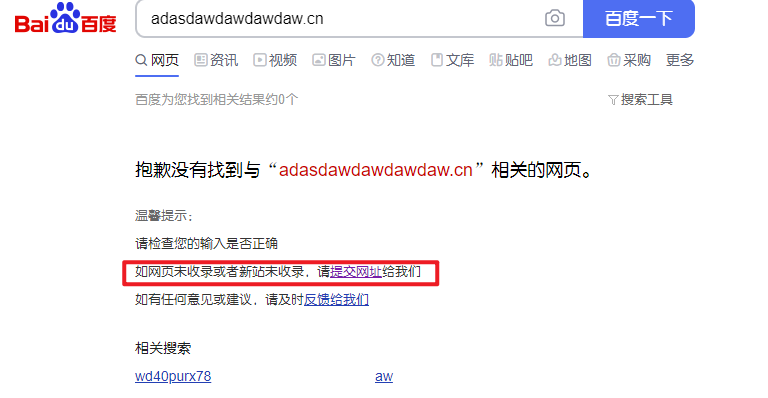
如果想直接使用Gitee或者Github生成的网址,不绑定个人域名
这个情况,验证网址时不可以选择CNAME验证,可以选择第一种,下载一个静态网页放在项目根目录上。
注意:这里的根目录,为博客本地文件夹下的public文件夹。这样才可以通过
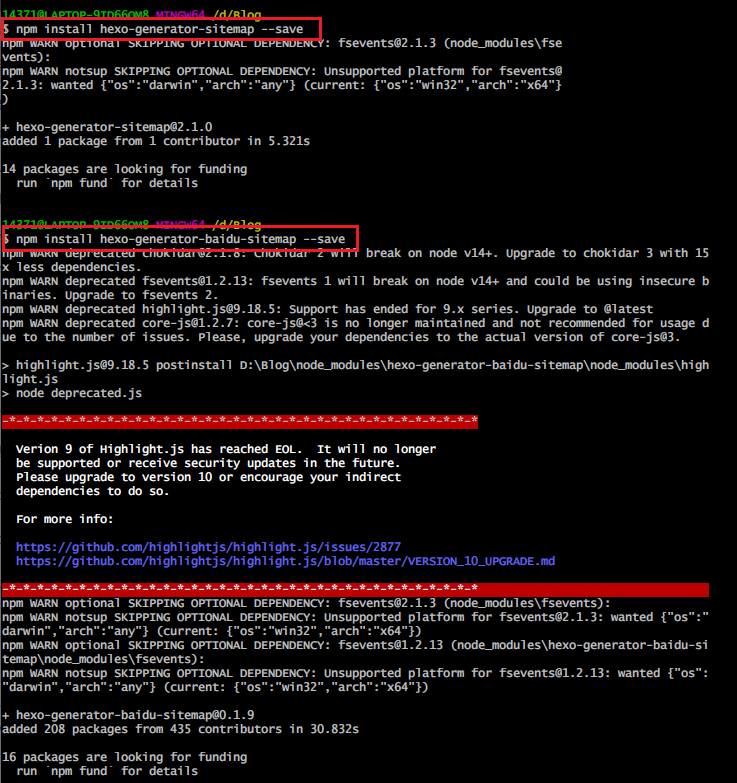
3.生成网站地图sitemap
这一步,在必应收录和谷歌收录一样用。
npm install hexo-generator-sitemap --save
npm install hexo-generator-baidu-sitemap --save
分别运行就行,如果出现warning不用管
修改博客配置文件_config.yml中
# URL
## If your site is put in a subdirectory, set url as 'http://example.com/child' and root as '/child/'
url: http://example.com       #修改为你的域名
root: /
permalink: :year/:month/:day/:title/
permalink_defaults:
pretty_urls:
  trailing_index: true
  trailing_html: true
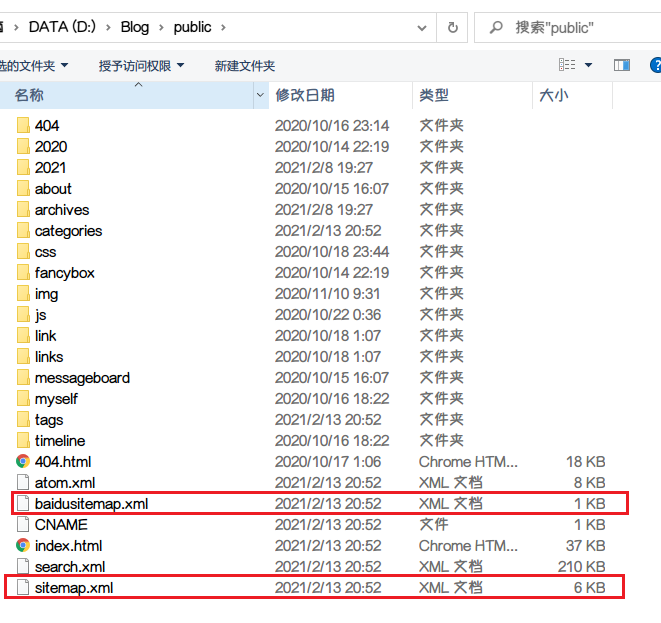
之后使用git bash运行 hexo c、 hexo g、hexo d
在博客目录下public下多出了baidusitemap.xml、sitemap.xml文件
4.普通收录
进入百度站点管理-站点属性-普通收录–sitemap
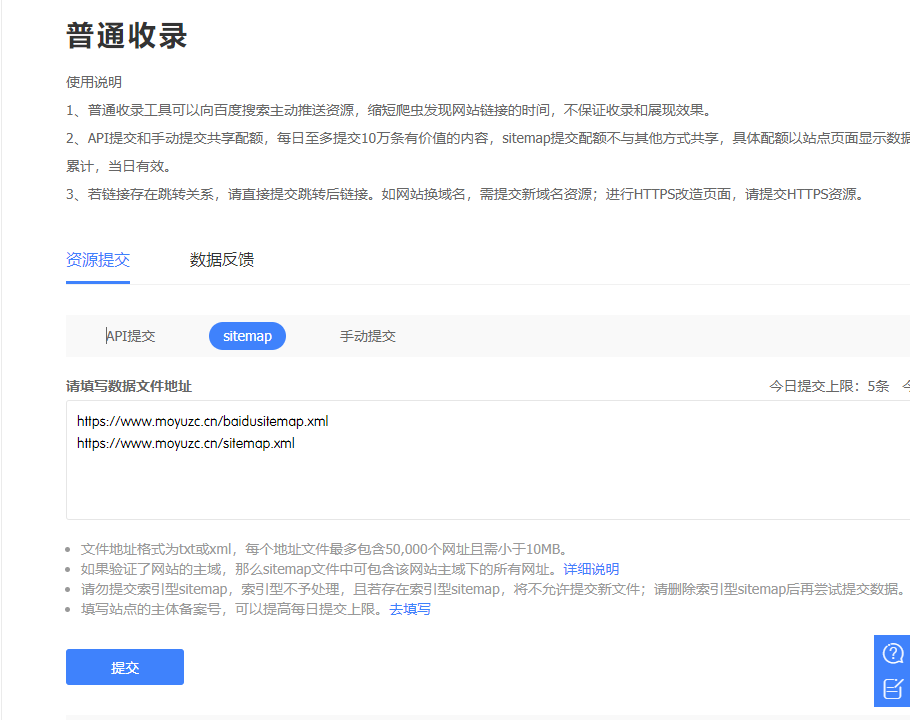
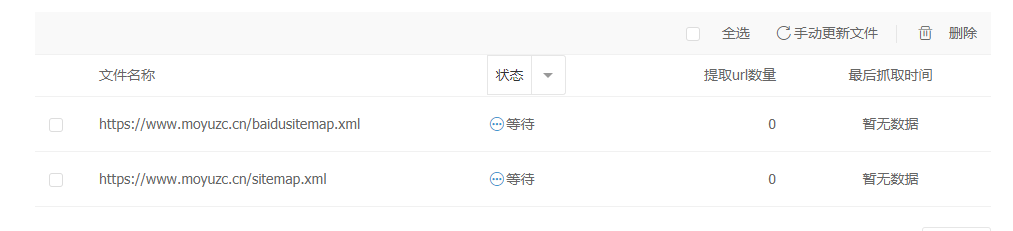
换成你自己的域名提交就行
之后就是漫长的等待可能得一两个星期
必应收录
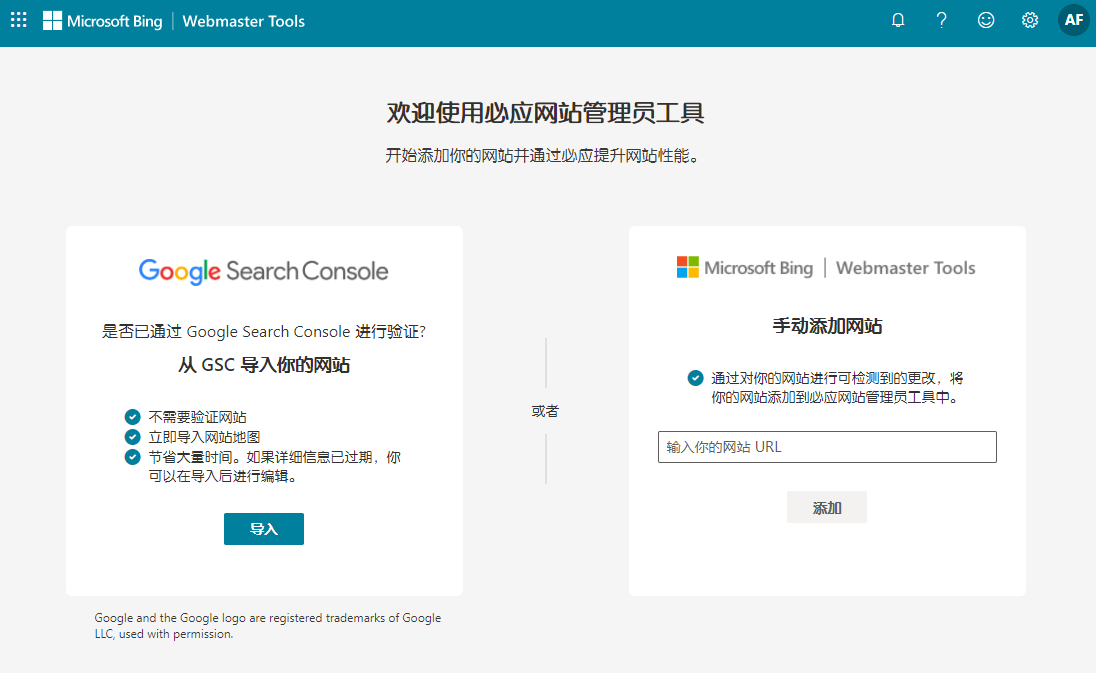
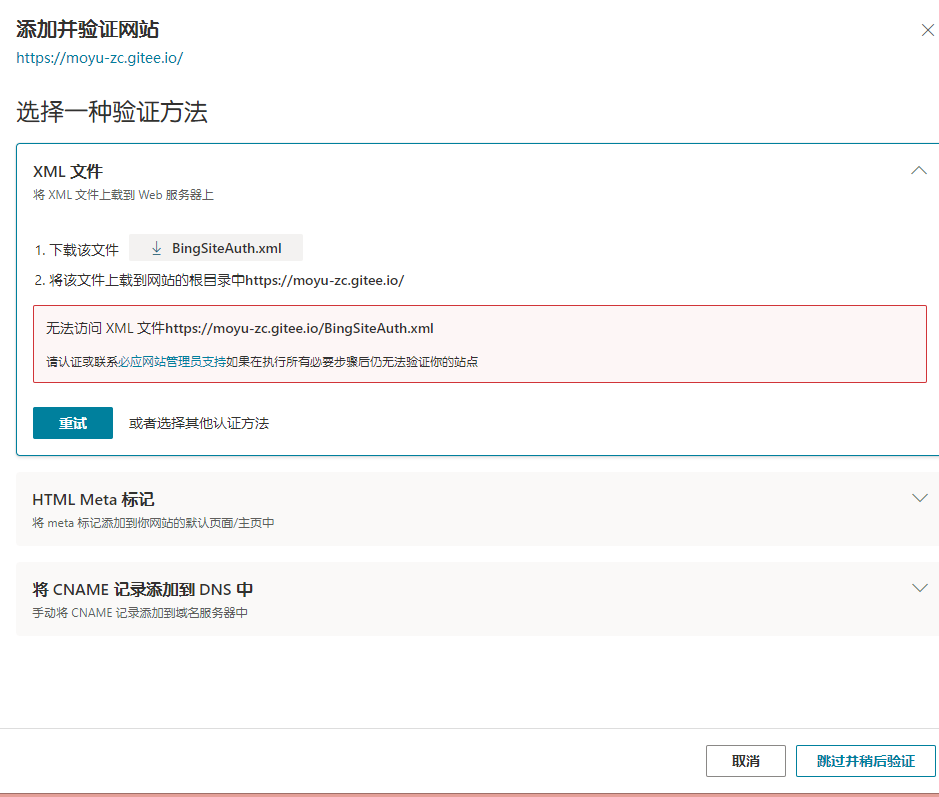
1.必应站长平台
必应收录也是很简单,点击必应站长。先注册登录,必应收录有两种方式,一种使用刚刚谷歌导入过去,第二种是就是自己添加URL
这些和百度收录方式相同,可以看看上面
2.普通收录
验证成功后,提交网站地图
提交之前生成网站地图,和上面的方法相同
提交之后,就可以等着了。
Google收录
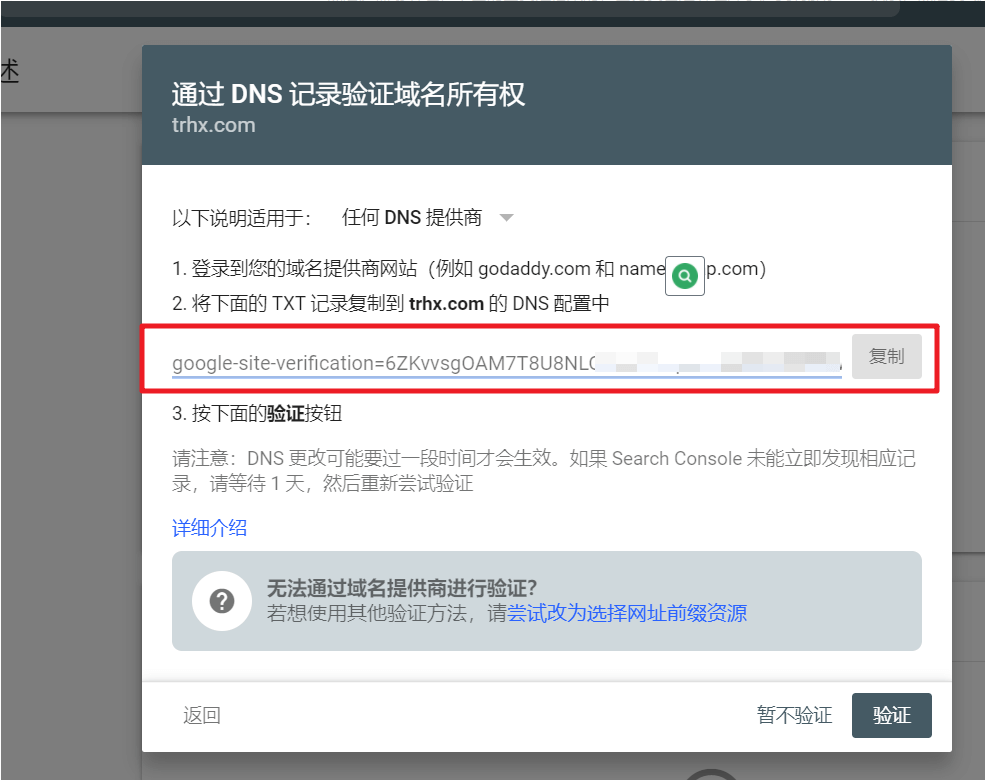
1.谷歌站长平台
进入谷歌站长,登录你的谷歌账号。然后如下操作,要是第一次就弹出一个让你输入域名的提示框,就直接输入你要收录的网站域名就行。

这些和百度收录方式相同,可以看看上面
2.普通收录
输入完就不用去理了。第二天会自动收录。