环境搭建:改系列文章开始有介绍。这部分代码所在磁盘位置:
F:\workspace\SpringMVC代码\springMVC-demo4
设置:
request.setAttribute("testRequestScope","Hello,ServletAPI");。取值:通过key
1.1 核心部分代码
设置值
    /**
     * 使用servletAPI向request域对象共享数据
     * @param request
     * @return
     */
    @RequestMapping("/testRequestScope")
    public String toSuccess(HttpServletRequest request){
        request.setAttribute("testRequestScope","Hello,ServletAPI");
        return "success";
    }
跳转后页面获取数据
<!DOCTYPE html>
<html lang="en" xmlns:th="http://www.thymeleaf.org">
<head>
    <meta charset="UTF-8">
    <title>success</title>
</head>
<body>
这里是成功页面
<p th:text="${testRequestScope}"></p>
</body>
</html>
1.2 测试结果

2、使用ModelAndView向request域对象共享数据
1.1 核心代码
    /**
     * @return
     */
    @RequestMapping("/testModelAndView")
    public ModelAndView testModelAndView() {
        /**
         * ModelAndView有Model和View的功能
         * Model主要用于向请求域共享数据
         * View主要用于设置视图,实现页面跳转
         */
        ModelAndView mav = new ModelAndView();
        //用来处理模型数据,向请求域request共享数据
        mav.addObject("testRequestScope", "Hello,ModelAndView");
        //设置视图名称
        mav.setViewName("success");
        return mav;

    }
取值同1.1
1.2 测试结果

3、使用Model向request域对象共享数据
3.1 核心代码
    /**
     * 测试Model
     * @param model
     * @return
     */
    @RequestMapping("/testModel")
    public String testModel(Model model){
        model.addAttribute("testRequestScope","Hello,Model");
        return "success";
    }
取值同1.1
3.2 测试结果

4、使用map向request域对象共享数据
4.1 核心代码
/**
* 测试MaP
* @param map
* @return
*/
@RequestMapping("/testMap")
public String testMap(Map<String,Object> map){
map.put("testRequestScope","Hello,Map");
return "success";
}
取值方法同1.1
4.2 测试结果

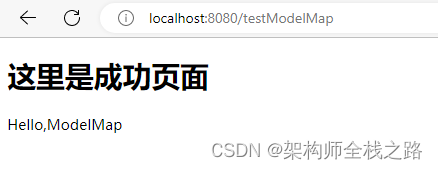
5、使用ModelMap向request域对象共享数据
5.1 核心代码
    /**
     * 测试 ModelMap
     * @param modelMap
     * @return
     */
    @RequestMapping("/testModelMap")
    public String testModelMap(ModelMap modelMap){
        modelMap.addAttribute("testRequestScope","Hello,ModelMap");
        return "success";
    }
取值同1.1
5.2 测试结果

6、Model、ModelMap、Map的关系
CTRL+H 查看实现接口类。通过反射查看调用的对应方法
Model、ModelMap、Map类型的参数其实本质上都是 BindingAwareModelMap 类型的
public interface Model{}
public class ModelMap extends LinkedHashMap<String, Object> {}
public class ExtendedModelMap extends ModelMap implements Model {}
public class BindingAwareModelMap extends ExtendedModelMap {}
通过反射查看调用的方法
System.out.println(model.getClass().getName());
System.out.println(map.getClass().getName());
System.out.println(modelMap.getClass().getName());


7、向session域共享数据
7.1 核心代码
    /**
     * 测试Session
     * @param session
     * @return
     */
    @RequestMapping("/testSession")
    public String testSession(HttpSession session){
        session.setAttribute("testSession","Hello Session");
        return "success";

    }
取值方法
<p th:text="${session.testSession}"></p>
7.2 测试结果

8、向application域共享数据
8.1 核心代码
    /**
     * 测试Application
     * @param session
     * @return
     */
    @RequestMapping("/testApplication")
    public String testApplication(HttpSession session){
        ServletContext application = session.getServletContext();
        application.setAttribute("testApplication","Hello Application");
        return "success";
    }
获取数据
<p th:text="${application.testApplication}"></p>
8.2 测试结果

9、项目结构
9.1 结构

9.2 首页跳转链接
<!DOCTYPE html>
<html lang="en" xmlns:th="http://www.thymeleaf.org">
<head>
    <meta charset="UTF-8">
    <title>首页</title>
</head>
<body>
<a rel="nofollow" th:href="@{/testRequestScope}">测试requestAPI</a>
<hr>
<a rel="nofollow" th:href="@{/testModelAndView}">测试ModelAndView</a>
<hr>
<a rel="nofollow" th:href="@{/testModel}">测试Model</a>
<hr>
<a rel="nofollow" th:href="@{/testMap}">测试Map</a>
<hr>
<a rel="nofollow" th:href="@{/testModelMap}">测试ModelMap</a>
<hr>
<a rel="nofollow" th:href="@{/testSession}">测试Session</a>
<hr>
<a rel="nofollow" th:href="@{/testApplication}">测试Application</a>
</body>
</html>
9.3 数据展示页面
<!DOCTYPE html>
<html lang="en" xmlns:th="http://www.thymeleaf.org">
<head>
    <meta charset="UTF-8">
    <title>success</title>
</head>
<body>
这里是成功页面
<p th:text="${testRequestScope}"></p>
<p th:text="${session.testSession}"></p>
<p th:text="${application.testApplication}"></p>
</body>
</html>
9.4 跳转控制器
package com.zyz.mvc.controller;

import org.springframework.stereotype.Controller;
import org.springframework.ui.Model;
import org.springframework.ui.ModelMap;
import org.springframework.web.bind.annotation.RequestMapping;
import org.springframework.web.servlet.ModelAndView;

import javax.servlet.ServletContext;
import javax.servlet.http.HttpServletRequest;
import javax.servlet.http.HttpSession;
import javax.servlet.http.HttpSessionContext;
import java.util.Map;

/**
 * @author zyz
 * @version 1.0
 * @data 2022/11/27 20:58
 * @Description:
 */

@Controller
public class TestController {
    @RequestMapping("/")
    public String toIndex() {
        return "index";
    }


    /**
     * 使用servletAPI向request域对象共享数据
     *
     * @param request
     * @return
     */
    @RequestMapping("/testRequestScope")
    public String toSuccess(HttpServletRequest request) {
        request.setAttribute("testRequestScope", "Hello,ServletAPI");
        return "success";
    }

    /**
     * 测试ModelAndView
     * @return
     */
    @RequestMapping("/testModelAndView")
    public ModelAndView testModelAndView() {
        /**
         * ModelAndView有Model和View的功能
         * Model主要用于向请求域共享数据
         * View主要用于设置视图,实现页面跳转
         */
        ModelAndView mav = new ModelAndView();
        //用来处理模型数据,向请求域request共享数据
        mav.addObject("testRequestScope", "Hello,ModelAndView");
        //设置视图名称
        mav.setViewName("success");
        return mav;

    }

    /**
     * 测试Model
     * @param model
     * @return
     */
    @RequestMapping("/testModel")
    public String testModel(Model model){
        model.addAttribute("testRequestScope","Hello,Model");
        System.out.println(model.getClass().getName());
        return "success";
    }

    /**
     * 测试MaP
     * @param map
     * @return
     */
    @RequestMapping("/testMap")
    public String testMap(Map<String,Object> map){
        map.put("testRequestScope","Hello,Map");
        System.out.println(map.getClass().getName());
        return "success";
    }

    /**
     * 测试 ModelMap
     * @param modelMap
     * @return
     */
    @RequestMapping("/testModelMap")
    public String testModelMap(ModelMap modelMap){
        modelMap.addAttribute("testRequestScope","Hello,ModelMap");
        System.out.println(modelMap.getClass().getName());
        return "success";
    }

    /**
     * 测试Session
     * @param session
     * @return
     */
    @RequestMapping("/testSession")
    public String testSession(HttpSession session){
        session.setAttribute("testSession","Hello Session");
        return "success";

    }

    /**
     * 测试Application
     * @param session
     * @return
     */
    @RequestMapping("/testApplication")
    public String testApplication(HttpSession session){
        ServletContext application = session.getServletContext();
        application.setAttribute("testApplication","Hello Application");
        return "success";
    }


}
10、后语
学无止境。。。。。。